
The Richardson Healthcare engineering team has put together a list of important dos and don’ts to remember during a CT Tube install.
DO refer to OEM service documents for complete work instructions. The information in this blog post is meant as an overview and should not be considered complete instructions.
DON’T shortcut the process. The install steps are outlined below and each step is important to the proper installation, adjustment, and calibration of the tube. A complete tube replacement will take approximately 8 hours for completion.
DO download and save any XCLog files and I/F adjustment files prior to any work being completed. These files may prove valuable for future reference and/or troubleshooting.
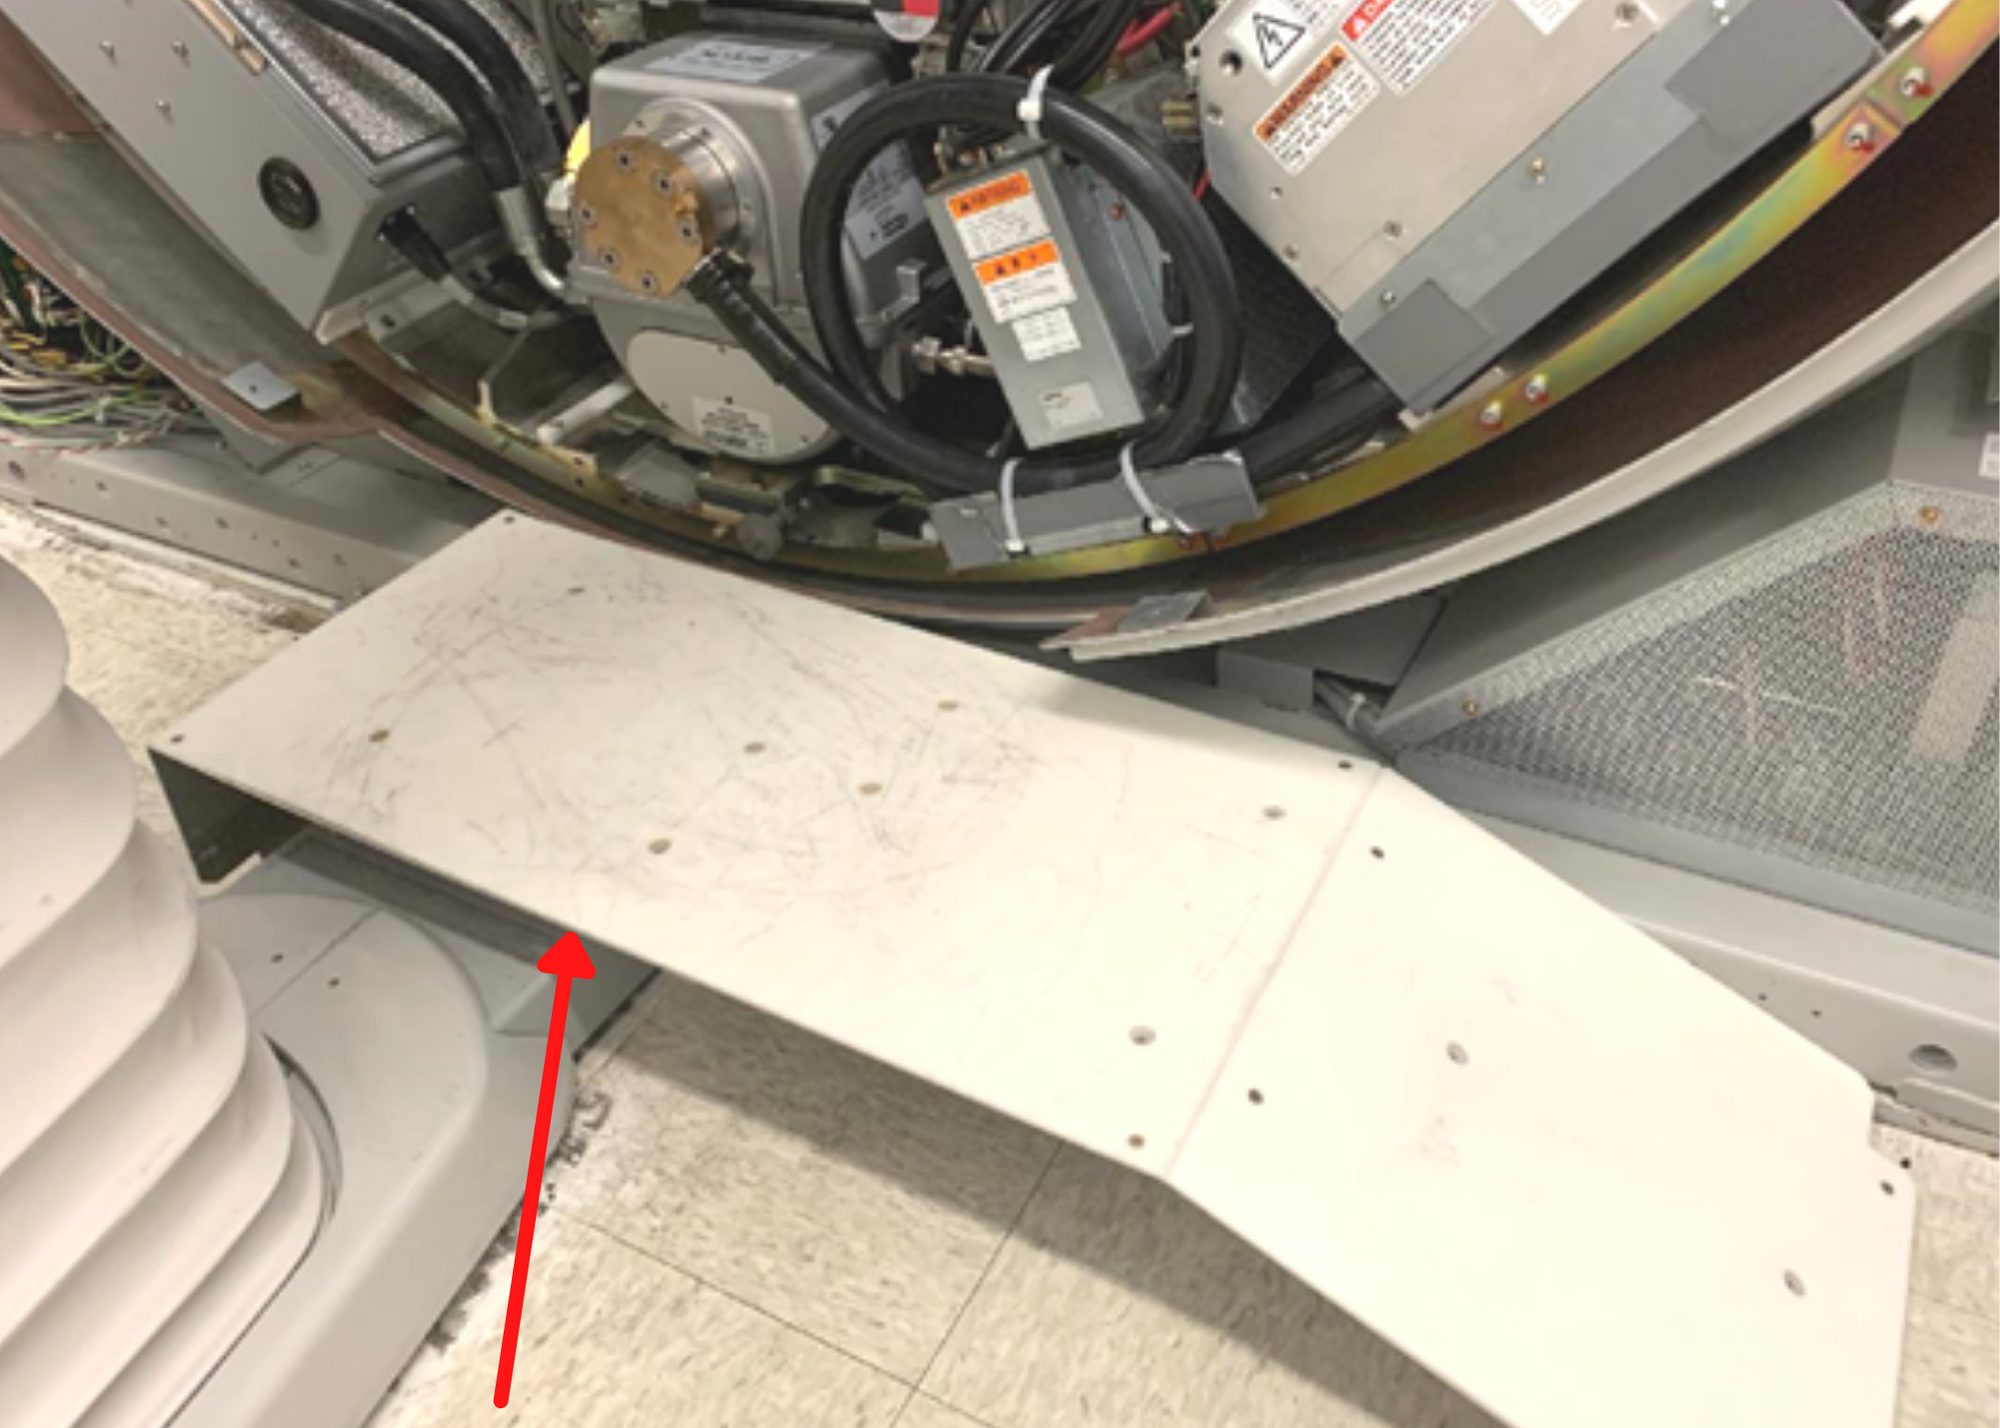
DON’T try to manually lift the tube in or out of the gantry. Use the tube replacement jig that is included with every Aquilion 16/32/64 CT scanner. The tube replacement jig makes it possible for one service engineer to replace the tube with minimal risk of personal injury. The instructions for use of the jig can be found in the Manufacturer’s Replacement and Adjustment manual included with each scanner. The image below shows the jig in place during tube removal.
DO document the tube model number and serial number of the removed tube for future use. You will need this information to complete the Tube Service Report for return to Richardson Healthcare.
DO complete the following procedure for adjustment and calibration of the tube once the tube is installed:
- Adjust the IF’s @ 80kV and 100Kv, Large and Small focus (approx. time is 5 minutes)
- Perform tube seasoning (approx. time is 1 hour)
- Wait at least 1 hour to allow the tube to cool down before proceeding to next step
- Warm the tube to 50% OLP (approx. time is 5 minutes)
- Adjust the IF’s at 80kV, 100kV, 120kV, and 135kV, large and small focus (approx. time is 20 minutes)
- Align tube from front to back (approx. time is 30 minutes)
- Align tube from left to right (approx. time is 45 minutes)
- Perform water and air calibrations (approx. time is 4 hours)
- Perform and document all standard QA scans
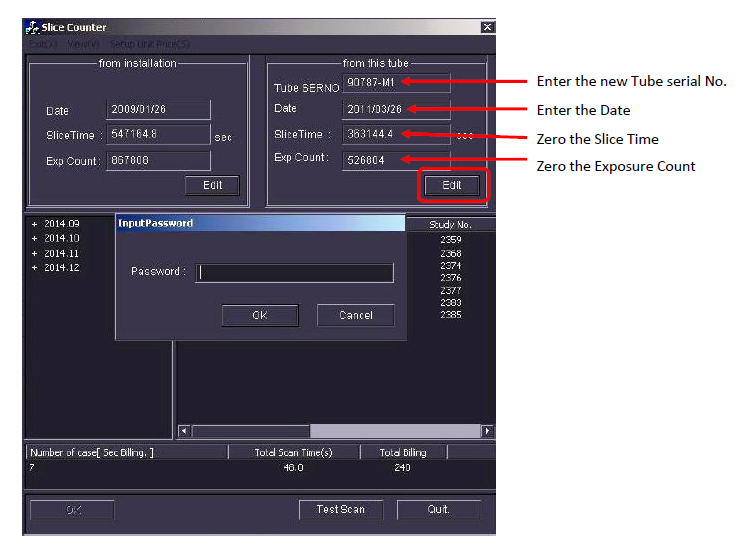
- Reset the slice counter and record serial number
- Complete and return the Tube Service Report to Richardson Electronics
DON’T rush the wait after the seasoning. The tube seasoning goes through a heat/cool/heat cycle in the hour that it takes to complete. The seasoning helps increase tube reliability; allow the tube to cool entirely to help insure maximum effectiveness.
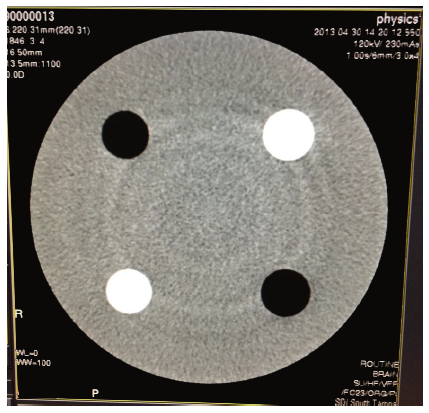
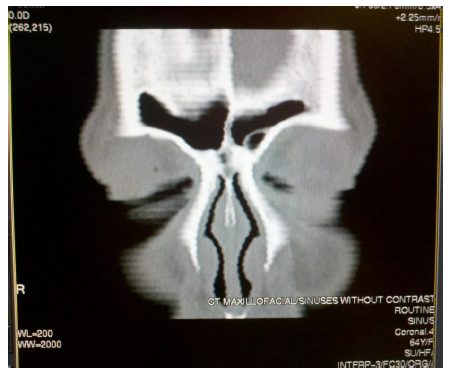
DO take care during the tube alignments. An incorrect tube alignment can lead to image quality issues. Below are two examples of possible image artifacts as a result of improper tube alignment:
- Poor front to back alignment can lead to soft ring artifact on some slices
- Poor left to right alignment can lead to Zebra artifact on MPR’s
DON’T leave out any NRA and Air calibrations. Completion of all calibrations helps ensure the best image quality for all protocols and may eliminate a possible future service call.
DO complete all QA scans. Completion of the QA scans will verify proper tube installation and operation of the CT system.
DON’T neglect the slice counter. Resetting the slice counter and serial number in the software will help with tracking the life cycle of the new tube.
DO fill out the tube service report. Accurate completion of the Tube Service Report will aid in a timely return of the tube to Richardson Electronics.
Want to learn more or have questions? Richardson Healthcare can help address challenges that may come with CT Tube installation. Our team is available and ready for your call. Rely on us 24/7 with our Tech Support and Parts Hotline – (704) 739-3597.
If you want to learn more, enroll in our Toshiba CT service training course today!
*All product and company names are trademarks™ or registered® trademarks of their respective holders. Use of the trademarks is solely for identification purposes and does not imply any affiliation with or endorsement by the trademark holders.


