
Our 24/7 Technical Support team helps our customers by answering the call when they need us most. Here is an inside look at why proper care during detector installation is important:
Why: Proper care should be exercised during detector service to minimize system downtime and ensure detector reliability.
Case Study: In this instance, we will examine a recent service event in which Richardson Healthcare Tech Support assisted a customer. This customer called our Parts and Tech Support Hotline [(704) 739-3597] with a ring artifact in the image acquired using their Aquilion PrimeS CT scanner.
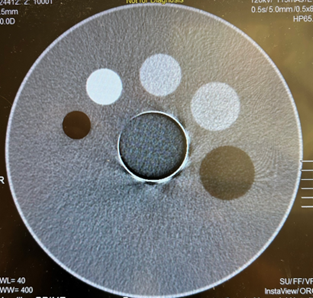
The image below shows the initial artifact the customer experienced.
Through our tech support call, the Richardson team was able to assist the customer in locating the cause of the artifact as a faulty QV-ADC board in slot 12 of the detector. A replacement board was ordered for installation the following day.
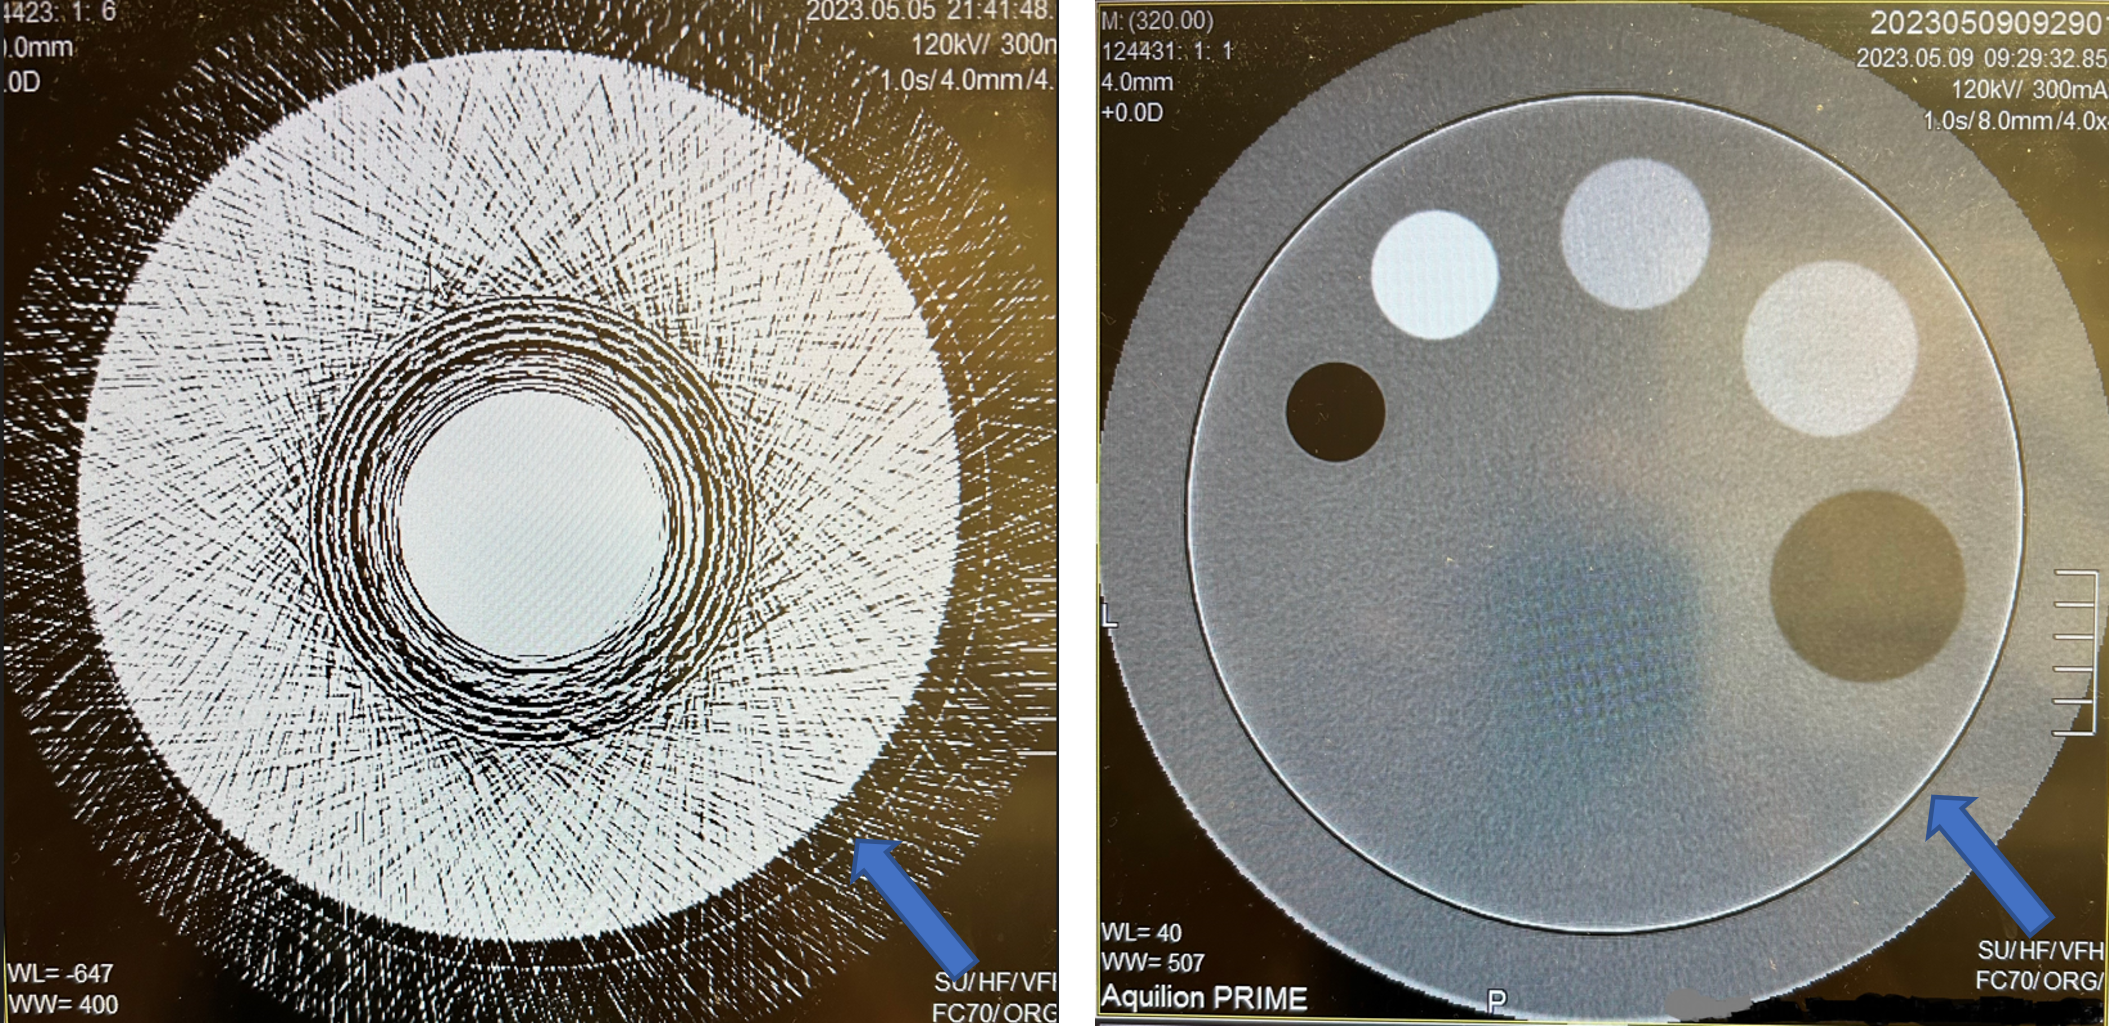
During the detector service, the local Biomed tech noticed a large amount of dust and lint inside the detector and around the QV-ADC boards due to a lack of maintenance. The tech decided to clean out the detector. Using proper static-control procedures the tech removed each QV-ADC board individually, vacuumed out the respective slot, and re-installed the board before moving on to the next board. After the detector cleaning, test scans were performed to check out the system. The test scans showed new ring artifacts indicating there were two additional QV-ADC boards damaged resulting in the image below (left) showing new ring artifacts and the associated streaks emanating from the rings. The cluster of rings inside the red circle are associated with QV-ADC13. The single ring indicated by the blue arrow is associated with QV-ADC15. QV-ADC13 was replaced and test calibrations were performed to highlight the ring artifact in the right image below for QV-ADC15.
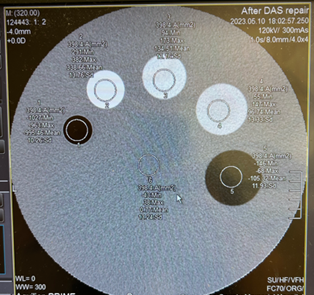
QV-ADC15 was replaced and a complete set of NRA and Air calibrations were performed. Below is the final QA scan of the TOS phantom showing all ring artifacts were resolved and the completion of a successful repair.
Conclusion: The BioMed tech was correct in their initiative to clean the detector that had been neglected for an undetermined amount of time. He was also correct in using proper static-control devices to minimize the risk of damaging the boards.
However, the recommended method does not involve removing the individual QV-ADC boards. The recommended method is to remove the front cover from the detector and use a vacuum to remove any easily accessible dust and lint from the detector cage. After that is removed, use canned compressed air to blow the dust and lint from the inside of the detector and between the QV-ADC boards without removing the QV-ADC boards. After blowing out the detector, use the vacuum to clean up any dislodged dust and lint particles. This method minimizes the risk of damage caused by having the vacuum nozzle in the detector and static damage to the QV-ADC boards. Following the recommended procedure would have prevented the cost of two additional QV-ADC boards and additional days of downtime.
If you are interested in learning more about how to perform proper preventative maintenance, contact our team to learn about our CT Training Courses. Our comprehensive program gives students an overview of the Aquilion CT series and provides training in system operation, installation, preventative maintenance, calibration, diagnostic procedures, troubleshooting, and repair. Graduates will be able to meet and exceed all service requirements for the Aquilion CT platforms.


